
SANDBOX BENEFITS
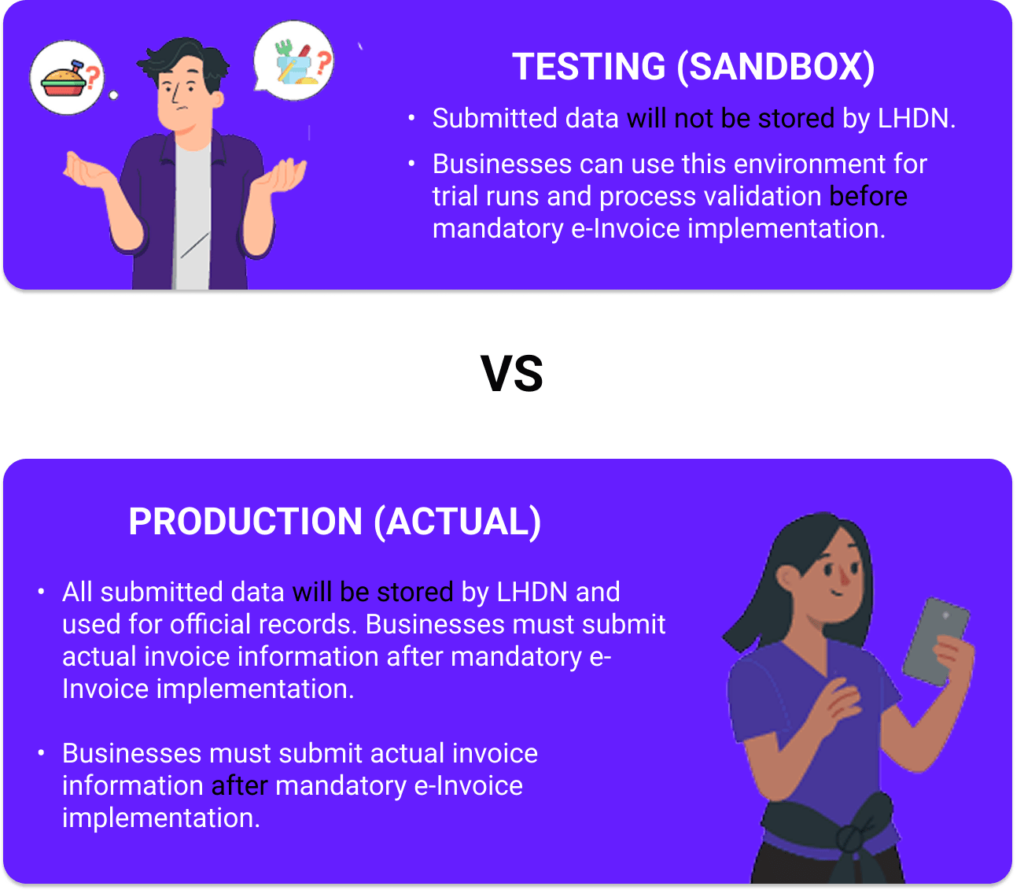
Sandbox is an e-Invoice practice environment provided by LHDN to help enterprises go online smoothly.
What is a Sandbox?
- Sandbox is a reliable simulation environment provided by LHDN (Inland Revenue Board).
- It allows businesses to pre-run their e-Invoices.
- Helps businesses familiarize themselves with the process, ensuring smooth implementation without issues.
- Test data will not be stored by LHDN or migrated to the production environment.

- The only financial software in the market that supports direct connection to the Sandbox
- You can set the mandatory e-Invoicing implementation date, and invoices will be automatically uploaded to the Sandbox beforehand
- Helps businesses achieve a seamless transition to the e-Invoice environment
- SQL makes preparing for e-Invoicing effortless and stress-free
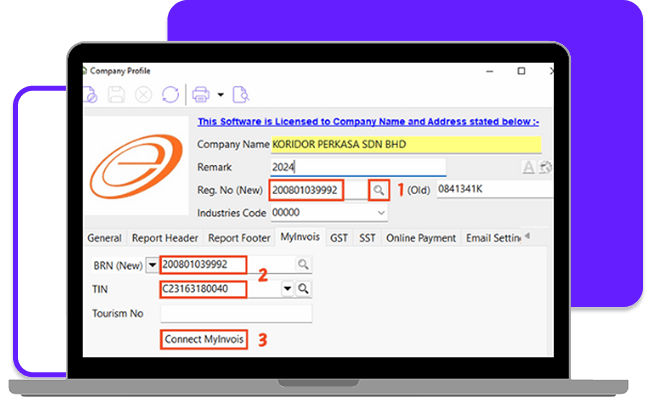
SQL Accounting Software Connection to MyInvois (Sandbox)
A. Register ERP
- Enter the company name and click the magnifying glass next to Reg. No (New) to select the correct company name.
- Reg. No., BRN, and TIN will be updated simultaneously.
- Click Connect MyInvois.
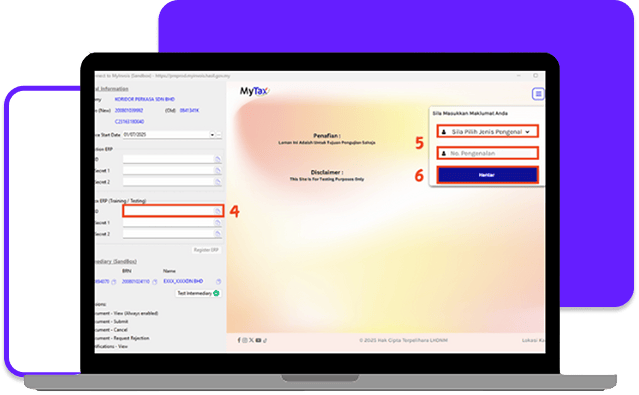
- Click on Client ID to be redirected to the pre-production (sandbox) login page.
- Select Identification Number (No. Kad Pengenalan) and enter the company owner‘s ID number.
- Click Submit (Hantar) and enter the verification code to authenticate the identity.
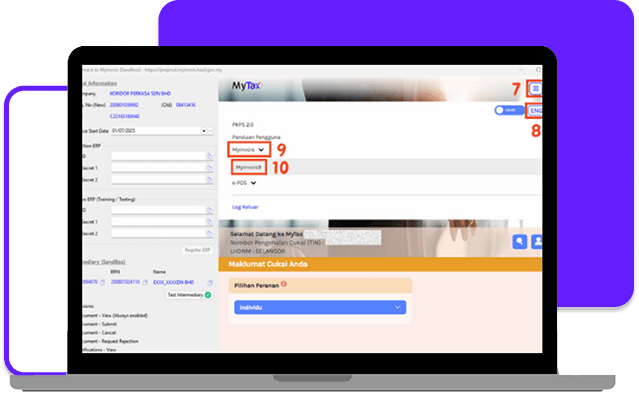
- Click on the menu in the top right corner.
- Select the preferred language.
- Click MyInvois.
- Click MyInvois9.
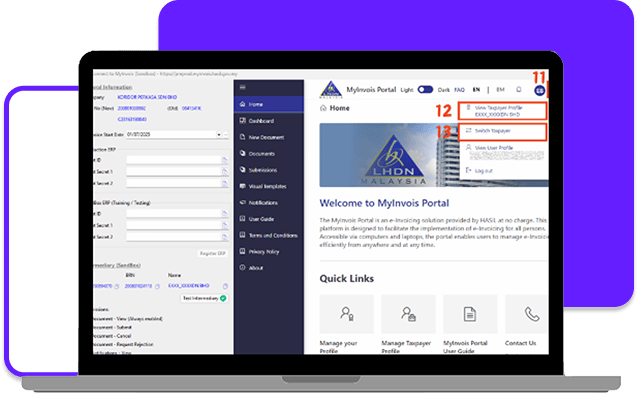
- Click the downward arrow in the top-right corner.
- If the taxpayer information matches your company name, click View Taxpayer Profile.
- If the company is not the one you want to set up, click Switch Taxpayer, then select the correct company name. After that, repeat steps 11 and 12, and proceed by clicking View Taxpayer Profile.
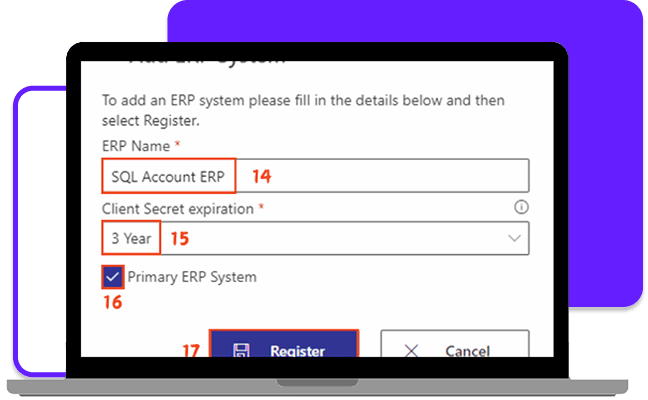
- ERP Name: SQL Account ERP
- Client Secret expiration: 3 Year
- Tick Primary ERP System
- Click Register
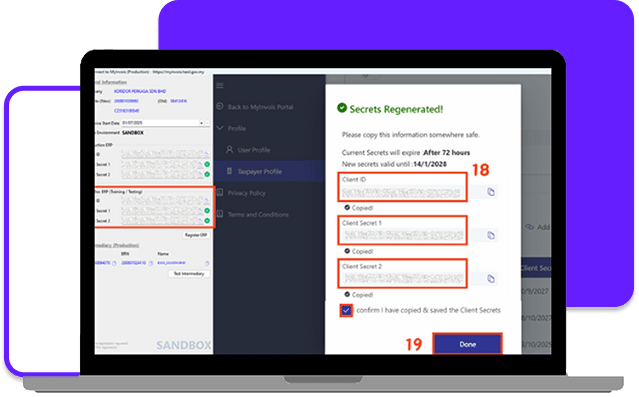
- Click the copy button next to the Secrets information on the right. The information will automatically populate the corresponding fields on the left.
- Click Done
B. Add Intermediary
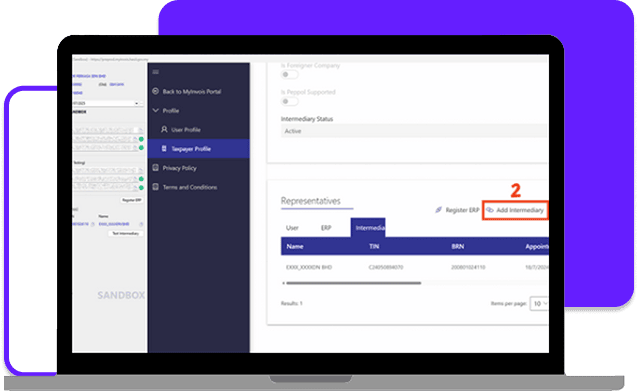
- Scroll to the bottom.
- Click Add Intermediary.
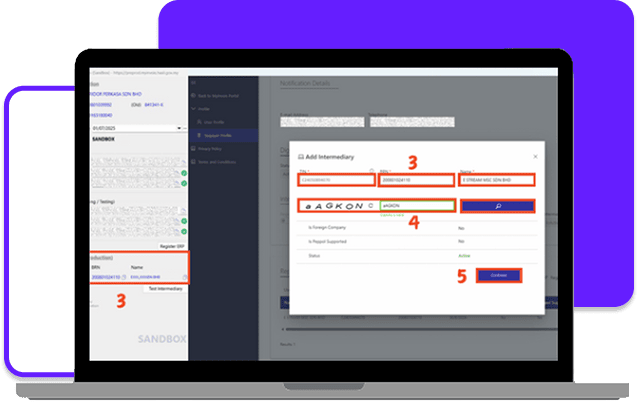
- Copy the information from the left side and paste it on the right. TIN: C24050894070 BRN: 200801024110 Name: EXXX_XXXXD BHD
- Enter the Captcha Value and click the magnifying glass.
- Click Continue.
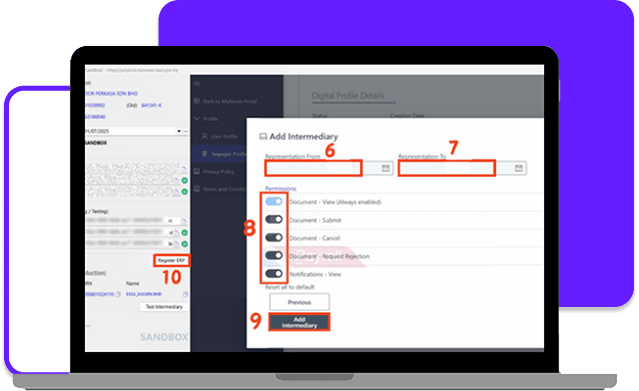
- Enter today’s date in Representation From.
- Do not fill in anything under Representation To to prevent the newly added intermediary from expiring.
- Enable all permissions.
- Click Add Intermediary.
- Click Register ERP and log in to the SQL system again to complete the process.
Share This Page
Share
Tweet
Related Posts


